|
Getting your Trinity Audio player ready...
|
Are you tired of sending out bulk emails that all look the same? Want to add a personal touch to your email campaigns but don’t have the time to personalize each one manually? Well, have no sweat because bulk email variables are here!
Email variables are like little helpers that can make your bulk email campaigns less of a chore and more of a breeze. They allow you to automatically insert personalized information into an email, making sending bulk emails much easier.
In this article, we’ll show you how to use email variables for bulk emails and take your email campaigns to the next level. So, grab a cup of coffee, and let’s dive in!
Read also: Best Email Drip Campaign Examples
What Are Variables in Email?
It’s no secret that email marketing is one of the most effective ways to reach out to customers and promote your products or services. But, let’s face it, sending out the same generic message to a whole list of people can be boring and ineffective. This is where bulk email variables have your back!
Email variables are placeholders that you can use to insert personalized information into an email automatically.
For example, a variable can automatically insert a customer’s name, address, or purchase history into an email.
This makes it much easier to set up batch emails, as you don’t have to manually insert this information into each email. It also allows you to run email campaigns more successfully.
Moreover, sending multiple emails using variables makes your emails more relevant to the recipient, leading to higher open and click-through rates.

Types of Email Variables
There are several different types of email variables that you can use in your email campaigns.
Some of the most common include:
- Personalization variables: These variables can be used to insert a customer’s name, address, or other personal information into an email.
For example, instead of addressing your email as “Dear valued customer,” you can use a personalization variable to automatically insert the customer’s name and make the email more personalized – its a part of the smart email personalization strategy.
- Dynamic content variables: These variables can be used to insert different content into an email depending on the recipient’s behavior or preferences.
For example, if a customer has previously purchased a product from you, you can use a dynamic content variable to insert a special offer for a related product into their email.
- Segmentation variables: These variables can be used to segment your email list and send targeted emails to specific groups of customers.
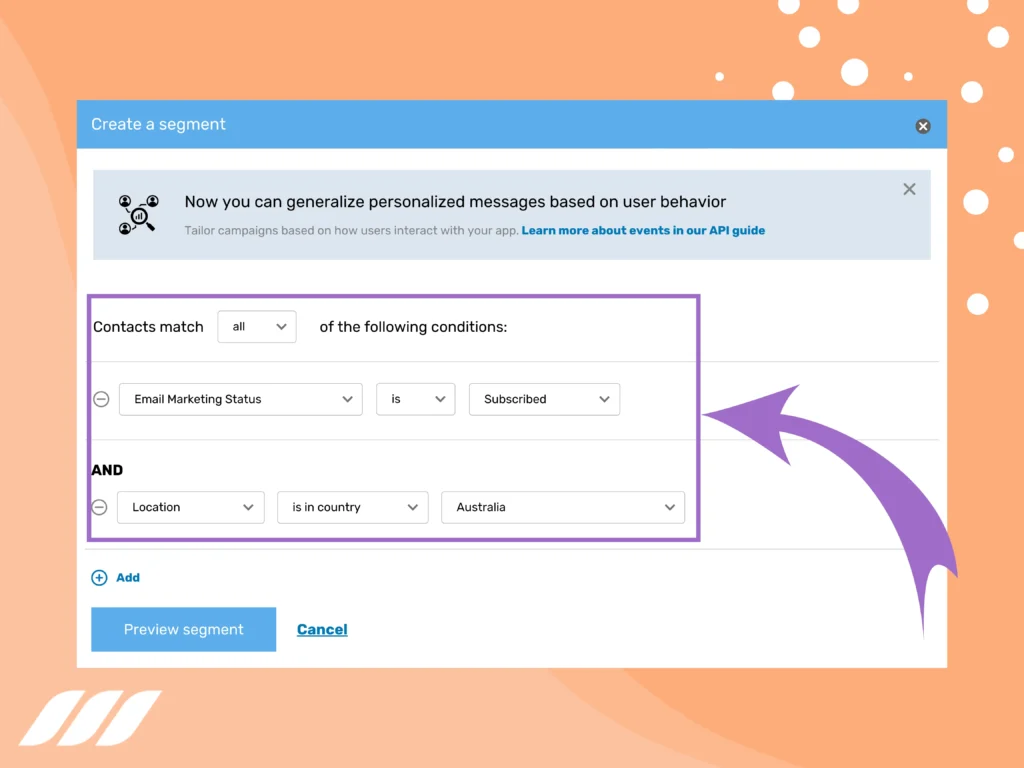
For example, you can use dynamic content variables to show different images or products to different email list segments.
This can help increase the relevance of the email to the recipient and improve the chances of them taking action.
- Behavioral variables: Behavioral variables allow you to track the recipient’s behavior and use this information to send targeted and relevant emails.
For example, you can use behavioral variables to track whether a recipient has opened or clicked on an email in the past and use this information to send follow-up emails.
Read also: Email Outreach Tracking Tips
- Product variables: Product variables allow you to insert information about a specific product or service into an email.
For example, you can use product variables to show the recipient the product they last viewed on your website or the product that’s currently on sale.
How to Use Custom Email Variables?
To use custom variables in your email campaigns, you will need to use an email marketing platform that supports custom variables. Most of the best email marketing platforms, such as Dripify, Mailchimp, and Constant Contact, support custom variables.
Once you have set up your email marketing platform, you can start using custom variables by creating a list of variables and inserting them into your email templates.
Here’re the steps you can follow to use custom variables:
1. Understand Your Audience
The first step in using custom variables is to understand your audience. This means segmenting your email list based on specific characteristics or behavior. For example, you can segment your email list based on the recipient’s location, purchase history, or email engagement.
This improves bulk email sending to different segments of your email list, which can improve the effectiveness of your email marketing campaigns.
2. Identify the Right Custom Variables
Once you clearly understand your audience, you can then identify the custom variables that will be most relevant to them.
For example, if you are targeting a segment of your email list that is located in a specific city, you can use a custom variable that displays special product or service offers for your customers in that city. This can make the email more relevant and engaging to the recipient.
3. Use Custom Variables in the Right Place
The placement of custom variables in your email is also important.
For example, it is a good idea to add variables to the subject line or the opening of the email, as this is where the recipient is most likely to see them. You may also want to add variables to the email content for specific audience segments, as it can improve conversion rates.
4. Test and Optimize
Once you have implemented custom variables in your email marketing campaigns, it is time to test and optimize them. This includes monitoring the results of your campaigns and adjusting the custom variables as needed to improve their effectiveness.
For example, if you notice that a specific custom variable does not have the desired effect, you can try removing or replacing it with a different one.
5. Keep it Simple
It is important to remember that custom variables should be used to enhance the relevance of your emails and not overcomplicate them. So, be sure to keep it simple, easy to understand, and easy to apply.

How to Create Custom Email Variables?
Creating custom variables is simple and can be done in a few easy steps:
Identify the Information You Want to Include
First, you’ll need to identify the information you want to include in your emails. This could be anything from the recipient’s name, location, or purchase history. You should consider what information will be most relevant to your audience and how it can be used to personalize your emails.
Use a Marketing Automation Platform
Once you’ve identified the information you want to include, you can use a marketing automation platform to create custom variables. Most popular marketing automation platforms like Dripify, Campaign Monitor, etc., can add and manage custom variables. These platforms will usually have a user-friendly interface that makes it easy to create custom variables and insert them into your emails.
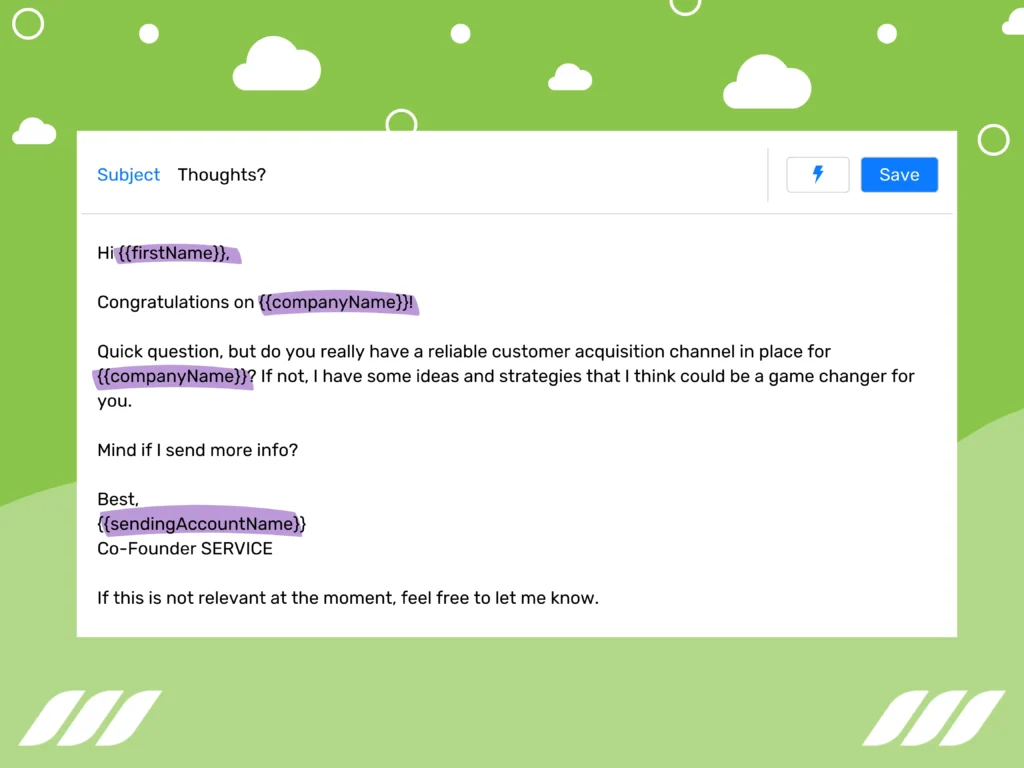
Use Merge Tags
Merge tags are special codes used to insert custom variables into your emails. These tags are usually specific to the marketing automation platform you are using, so you will need to consult the platform’s documentation to learn how to use them. Merge tags can be inserted into the subject line, body, email sign offs, or any other part of the email.
Execute Custom Variables in Your Email Marketing Tool

How you can implement custom variables depends on the email marketing platform you are using. Most platforms have the following steps to create custom variables:
- Go to your email marketing platform and select the list of variables.
- Click on the “Create new variable” button.
- Name your variable and select the type of variable you want to create (e.g., personalization, dynamic content, segmentation).
- Enter the variable’s value, which will be the information that will automatically be inserted into the email (e.g., customer’s name, address, and purchase history).
- Save the variable, and you’re ready to use it in your email template.
What Are the Five Rules for Creating Email Variables?
1. Segment Your Audience
The first rule for creating email variables is to segment your audience. This means dividing your email list into smaller groups based on characteristics or behavior. For example, you can segment your email list based on the recipient’s location, purchase history, or email engagement.
Audience segmentation allows you to send targeted and relevant emails to different groups of your email list, which can improve the effectiveness of your email marketing campaigns.
2. Personalize Your Email
Next, it is vital to personalize your email by adding variables that relate to your audience. Your email variables should be closely related to the recipient’s interests, needs, or behavior.
For example, if you want to target a segment of your email list that is interested in a specific product, you can use a variable that displays the product’s features or benefits.
3. Place Your Variables Strategically
It is always a good idea to place your variables in the part of the email where they are most likely to be seen by the recipient. For example, it is generally more effective to use variables in the subject line or the opening of the email, as this is where the recipient is most likely to see them.
4. Use Dynamic Content
You can display different content to different recipients based on their behavior or characteristics using dynamic content. For example, you can use dynamic content variables to show different images or products to different email list segments. This can help increase the email’s relevance to the recipient and boost conversion rates.
5. Keep it Concise and Simple
You must use variables to enhance the relevance of your emails instead of confusing your audience. As such, you should avoid adding too many variables and keep the language and format of the variables easy to understand.
Read also: Best Time to Send Cold Emails
Conclusion
Email variables can greatly improve the performance of your email marketing campaigns and help you achieve better results.
You can improve the open and engagement rates by understanding your audience, segmenting your email list, and creating targeted and relevant emails.
Also, be sure to personalize your variables, place them strategically, and use dynamic content to create effective email variables. And by testing and optimizing your variables, you can monitor the performance of your campaigns and make necessary adjustments for better results.
![How to Write a Price Increase Letter [Tips, Examples, and Free Template]](https://dripify.io/wp-content/uploads/2021/12/27.png)
![How to Write an Effective Collaboration Email [+Templates]](https://dripify.io/wp-content/uploads/2023/05/13.png)